The following is a guest post by one of my favorite bloggers, Shannon Stonger of Nourishing Days. Shannon takes lovely photos documenting her adventures in off-grid living and sustainability and shares them on her blog. If you want eye-candy for homesteading, along with wisdom gleaned from simplifying her life and homesteading in Texas, check out Nourishing Days.
Spring brings light and dirt under the fingernails and green! From asparagus to scallions to spinach you can expect your market — or better yet garden — to start with these early bright green foods.
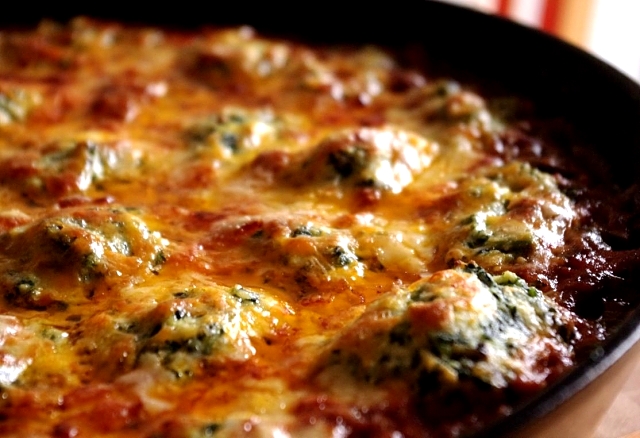
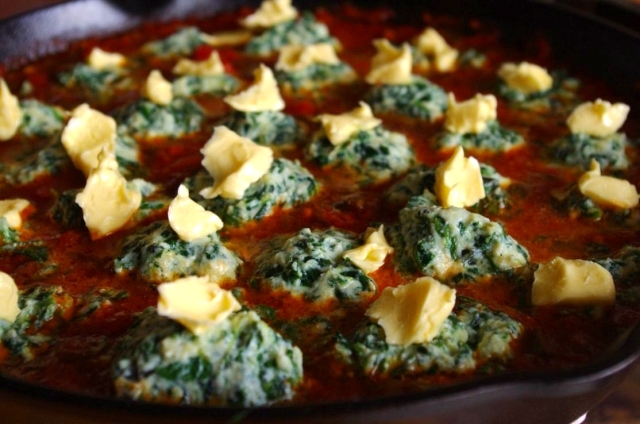
This recipe is a grain-free take on the classic comfort food stuffed shells. I completely take out the shell while the spinach-cheese filling transforms into “meatballs” that swim in a sea of meaty tomato sauce.
Best of all, this dish cooks in a large cast-iron skillet, which I use daily, from stove-top to oven.
Grain-Free Stuffed “Shells”
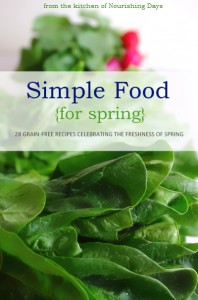
From Simple Food for Spring by Shannon Stonger
(28 grain-free recipes celebrating the freshness of spring)
The Players
SAUCE
- 2 teaspoons lard, coconut oil, or tallow (where to buy lard, coconut oil, and tallow)
- 6 oz. Italian sausage or ground meat (where to buy grass-fed & wild meats)
- 2 cups chopped spring onion
- 3 garlic cloves or scapes, minced
- 2 quarts home-canned tomatoes or about 7 cups diced tomatoes in juice (where to find BPA-free canned tomatoes)
CHEESE “FILLING”
- 1 tablespoon butter (where to find grass-fed butter)
- 1 3/4 lb. spinach
- 2 garlic cloves, minced
- 1 lb. ricotta cheese
- 1/3 cup freshly grated parmesan cheese (where to buy grass-fed parmesan cheese)
- 1/4 cup very lightly packed basil leaves
- 1 tablespoon minced parsley leaves
- Salt and pepper to taste
- 1 egg, beaten
FOR DISH
- 2 tablespoons of butter
- 1/4-1/2 cup grated cheese (parmesan, cheddar, or mozzarella) (where to find GMO-free cheddar, parmesan, & mozzarella)
The How-To
1. Place a large cast-iron skillet over medium-low heat. (I actually use this 3-in-1 cast iron combo cooker.) Melt the 1 tablespoon of butter in skillet and add spinach a bit at a time until it all fits into the pan. Season with sea salt and pepper and cook until completely wilted and most of the liquid has cooked off. Remove from pan and set in a clean towel-lined sieve placed over a bowl.
2. Pour off any additional liquid and return skillet to a medium heat. Add 2 teaspoons cooking fat and sausage or ground meat. If using ground meat season with salt and pepper. Cook over medium heat until browned and fat is rendered. Add onion and sauté a few minutes or until tender. Add garlic and sauté one more minute.
3. Pour in tomatoes, turn heat to medium, and bring to a simmer. Lower heat and simmer 20-30 minutes, or until sauce is nice and thick. (This time can vary depending on the tomatoes that you use). Taste and add salt and pepper as needed.
4. Meanwhile, prepare the “filling”. Take the spinach that is draining in a towel-lined sieve, lift all four corners of towel to form a handle. Twist towel ends, squeezing spinach out over the sink until all signs of liquid are gone. This could take several minutes, but it is the most important step so it is worth the effort.
5. Pour off any liquid from the bowl beneath the towel-lined sieve. Add the squeezed spinach to this bowl along with ricotta, minced garlic, parmesan, minced basil leaves, and parsley. Taste for seasoning and add salt and pepper to taste. Once well-seasoned add the beaten egg and mix well.
6. Once both the sauce and the filling are ready it is time to assemble the dish for baking. Form little balls with your hands out of 1-2 tablespoons of cheese mixture. Place cheese ―balls‖ closely together in tomato sauce-filled skillet with about 1/4—1/2 coming above the edge of the sauce. You will probably have to tuck the last few in here and there so don’t worry too much about them overlapping.
7. Dot the dish all over with bits of the 2 tablespoons of butter and sprinkle with 1/4—1/2 cup of cheese. Bake at 400 degrees for about 25 minutes, or until the cheese turns golden brown.
Meet Shannon
 Shannon Stonger lives with her husband and three children on their two acre off-grid homestead. She’s a cook and fermented foods enthusiast, a chicken wrangler and a seed planter, a helpmeet and a homemaker, a freelance writer and picture-taker with a focus on sustainable living.
She writes about all of the above on her blog, Nourishing Days.
This recipe was taken from her beautifully-photographed book, Simple Food For Spring.
If you haven’t already taken a look at her Simple Food cookbook series, may I suggest you do so? You won’t be disappointed!
 |







Wow…. This is happening for dinner tomorrow night. Thank you!
You’re welcome!
Rave reviews from the entire family–including our 4 small kiddos!! Served with a simple lettuce/tomato/red onion salad dressed with just ACV & olive oil. Was asked to make this a regularly! Thanks, as usual!!
This is a really kid-friendly meal, isn’t it?
Sounds wonderful and I can’t wait to make it! But, I would probably use a regular stainless steel skillet (ovenproof) since it isn’t a good idea to cook something acidic in cast iron (tomatoes) due to the leaching potential.
I don’t worry about cast iron leaching anything dangerous. Most of what it would leach are things that we are deficient in anyway.
I agree with Kristen. Plus, we don’t eat a ton of tomato-based meals cooked in cast-iron so I don’t worry about it.
Brilliant recipe! It was so delicious!
Glad you enjoyed it!
LOVE this! thanks for posting! Can’t wait to try it! Next week for sure!
We had this for dinner tonight and it was fantastic! It will definitely go into our rotation. Thanks!
It was yummy! I made it exactly as was written, though I think it would be delicious on top of spaghetti squash!
These are absolutely wonderful. I’m making them tonight for the second time this month. Even my extremely picky toddler devours them! I tend to make a massive batch and freeze extras because I find myself wanting to just eat this every day and night for like a week 😛 Thanks for the recipe!
oh, and I did make one quick edit the first time I made these as I didn’t have any ricotta on hand– I used plain greek yogurt, an extra egg, a little bit of corn starch (arrowroot or almond meal would also work, I bet), and extra shredded mozzarella in the ‘filling’. Even though greek yogurt is a drastically different consistency than ricotta, these ‘shells’ held together beautifully with yogurt and tasted absolutely gnarly. Ohhh boy. Alright, I’m going to get cooking before I drool all over my macbook.
Yum!